This article will show you how to create an email template to send notifications regarding invoices, send payment information requests and send invoice email reminders (Invoice Rover).
Please see the video at the bottom of this page with step by step instructions for creating an email template.
Step 1: Log into Benji Pays.

Step 2: In the blue menu to the left of the screen click on Settings and then click on "Email Templates."

Step 3: Click on the drop down arrow in the "Select a template type" box and select a template from the dropdown list. Please note: the "Email Reminder" templates are used with Invoice Rover.
1. Manual Send Invoice Email: Use this template to email an invoice directly to your customer, including a payment link.
2. Payment Information Request Email: This template should be used to request payment details from a customer via email.

- Invoice Overdue Email: Employ this template to send reminders via Invoice Rover for overdue invoices.
- Invoice Before Due Email: This template is for sending reminders about invoices that are soon due.
- New Invoice Email: Use this template to notify customers of newly created invoices.
- Account Summary Email: This template helps in sending a summary of all open invoices to your customers, either due or overdue, on predetermined days each month. Customers without open invoices will not receive an Account Summary.
Step 4: Click on the drop down arrow in the "Select a template box" and select the template you want to create.

Step 5: Click on the "Copy template" button.

Step 6: Rename the template under "Template Name".
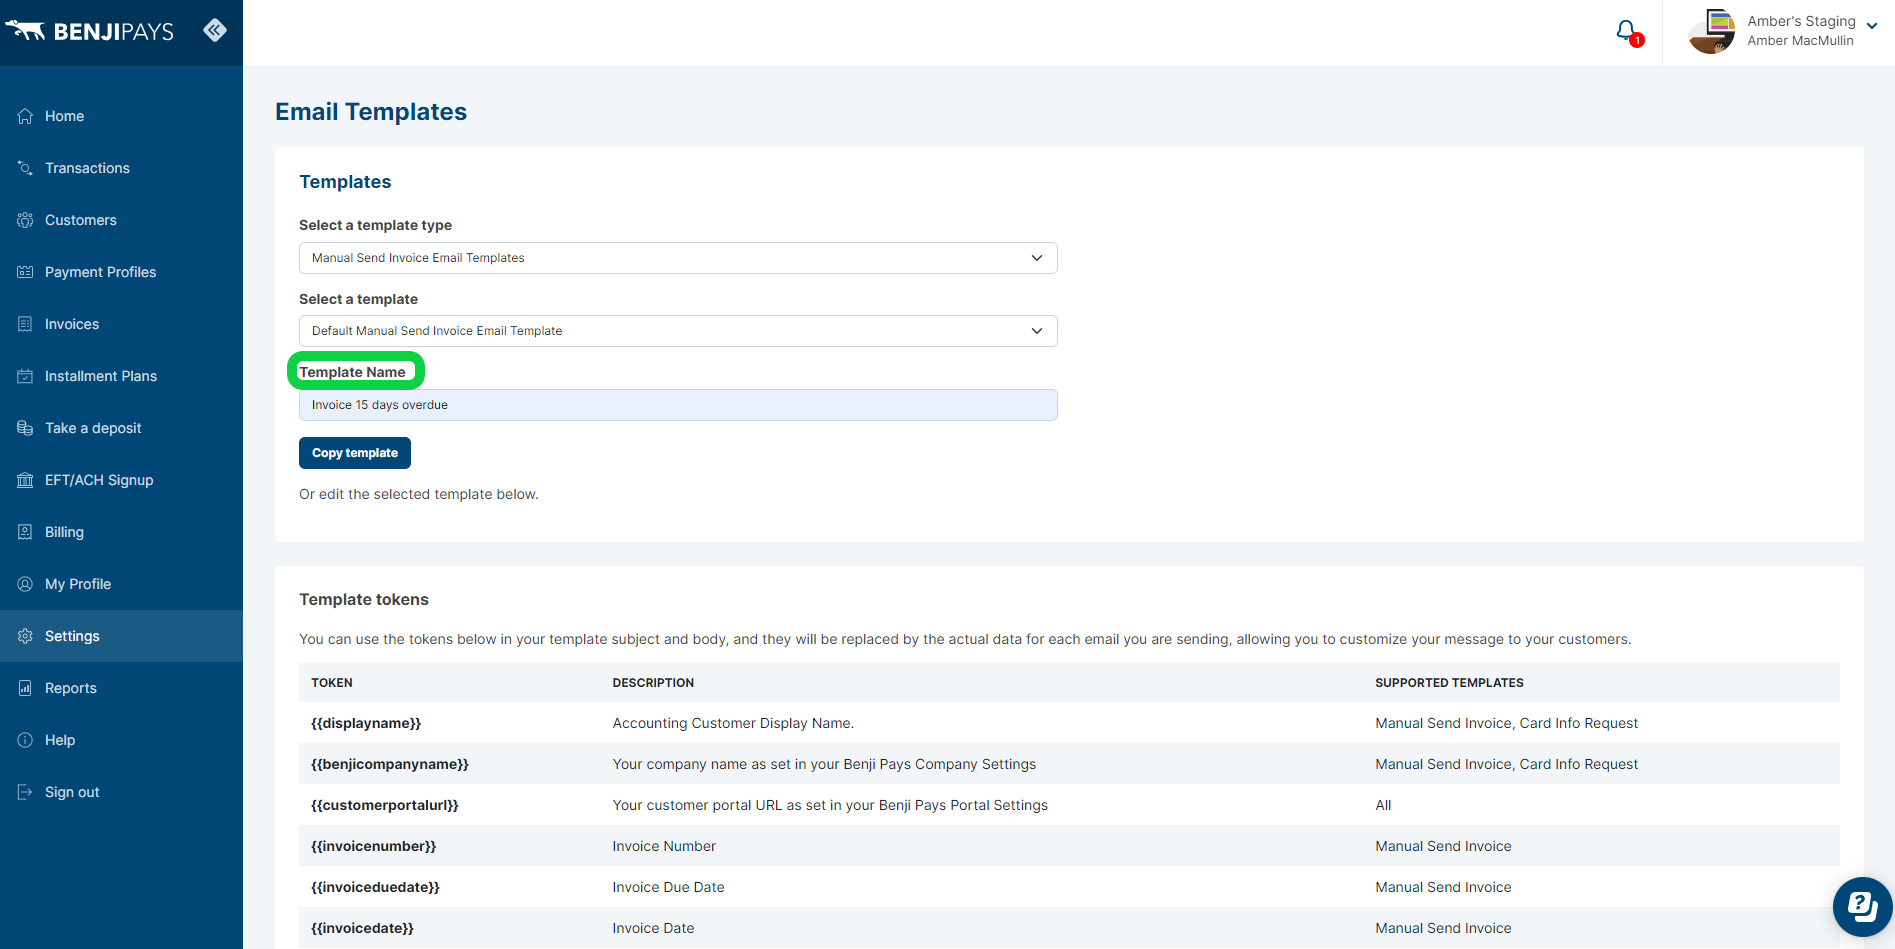
Step 7: These Template Tokens are available to use in the subject and body of the template. They will be replaced with the actual data for each email you are sending. This allows you to customize your message to your customer. Please note: The Template Tokens can only be used in the template you are creating and cannot be copied and pasted to an another template. For example: Template Tokens for Sending a New Invoice email cannot be used in a template for Sending a Payment Info Request or Email Reminders.

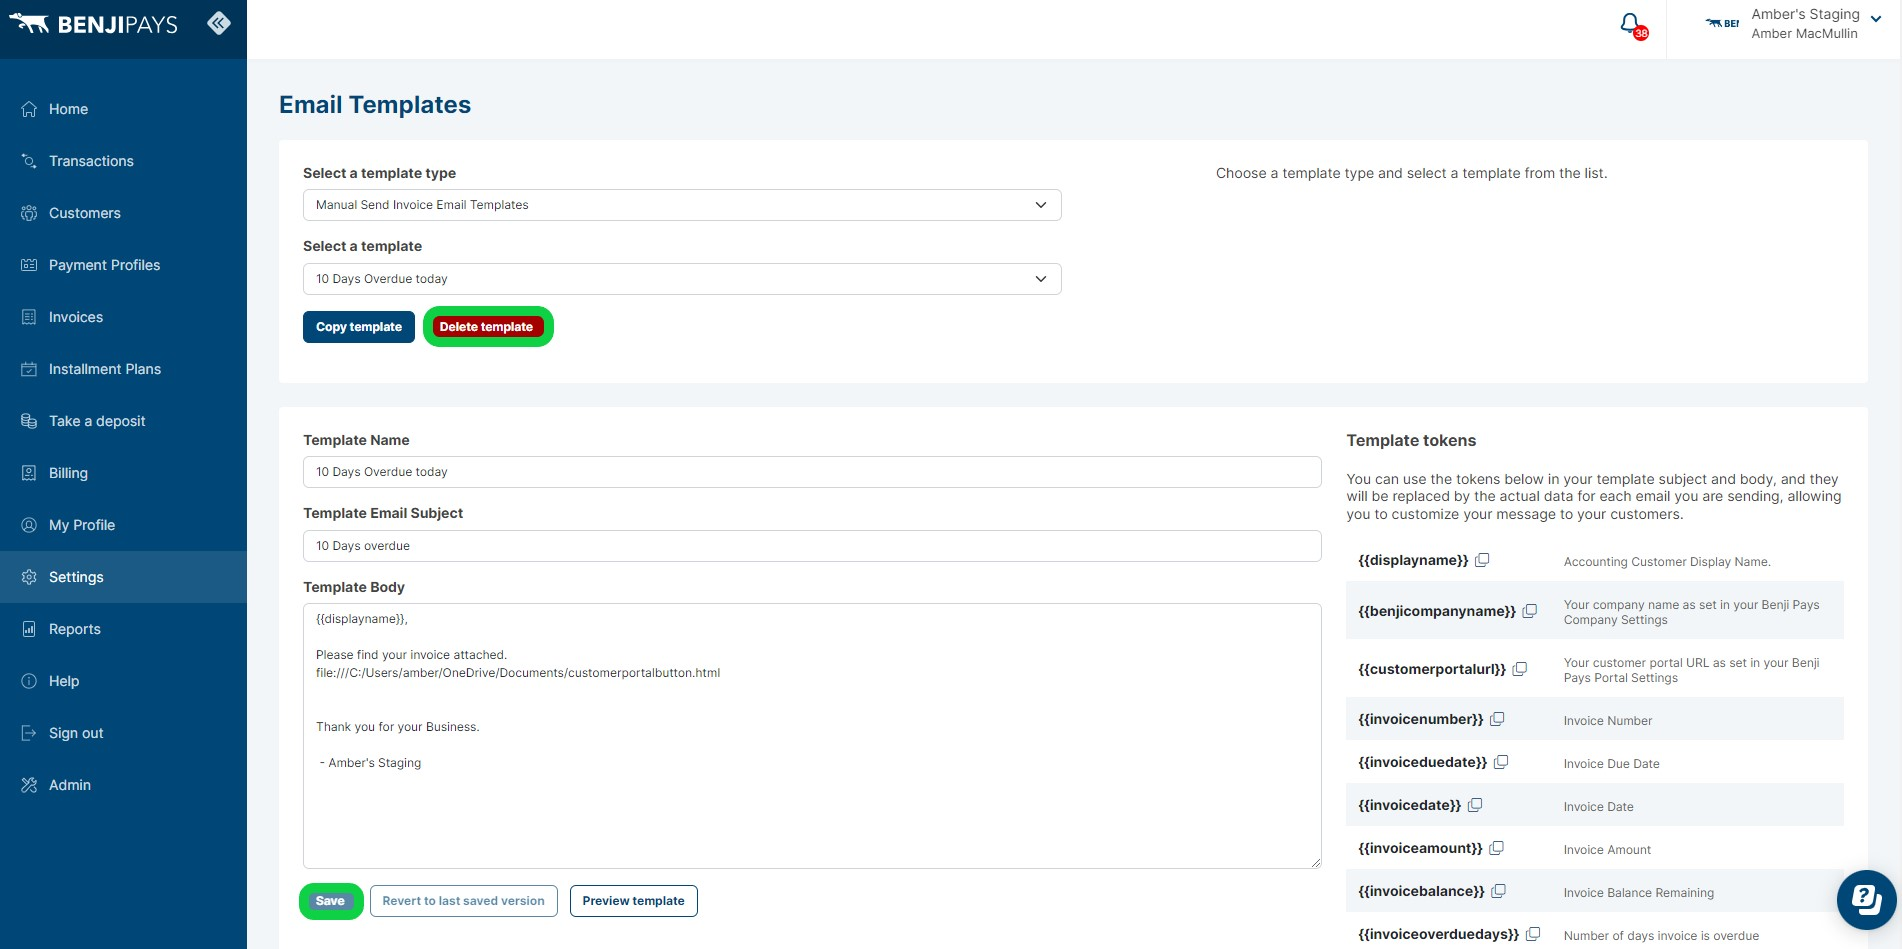
Step 8: You can change the Template Email Subject as well as the Template body by clicking in those areas and typing in the links or information you want to add to the email template. Once you have filled in the subject and body of the template, click the "Save" button.

Deleting a Template
You can delete a template by clicking the "Delete template" button, you can revert to your last saved version of your template by clicking the "Revert to last saved version" button and you can preview your template by clicking "Preview template" to see what it looks like to your customers. See screenshots below.
Reverting to Original Template
Click on "Revert to Last Saved Version" to see your original template.

Preview Template
Click on "Preview Template" before you save it to view it and make any edits.

Click "Save" to save the template.
For sending Invoice Email- (see steps below)
Step 1: To the left in the blue menu click on "Invoices".
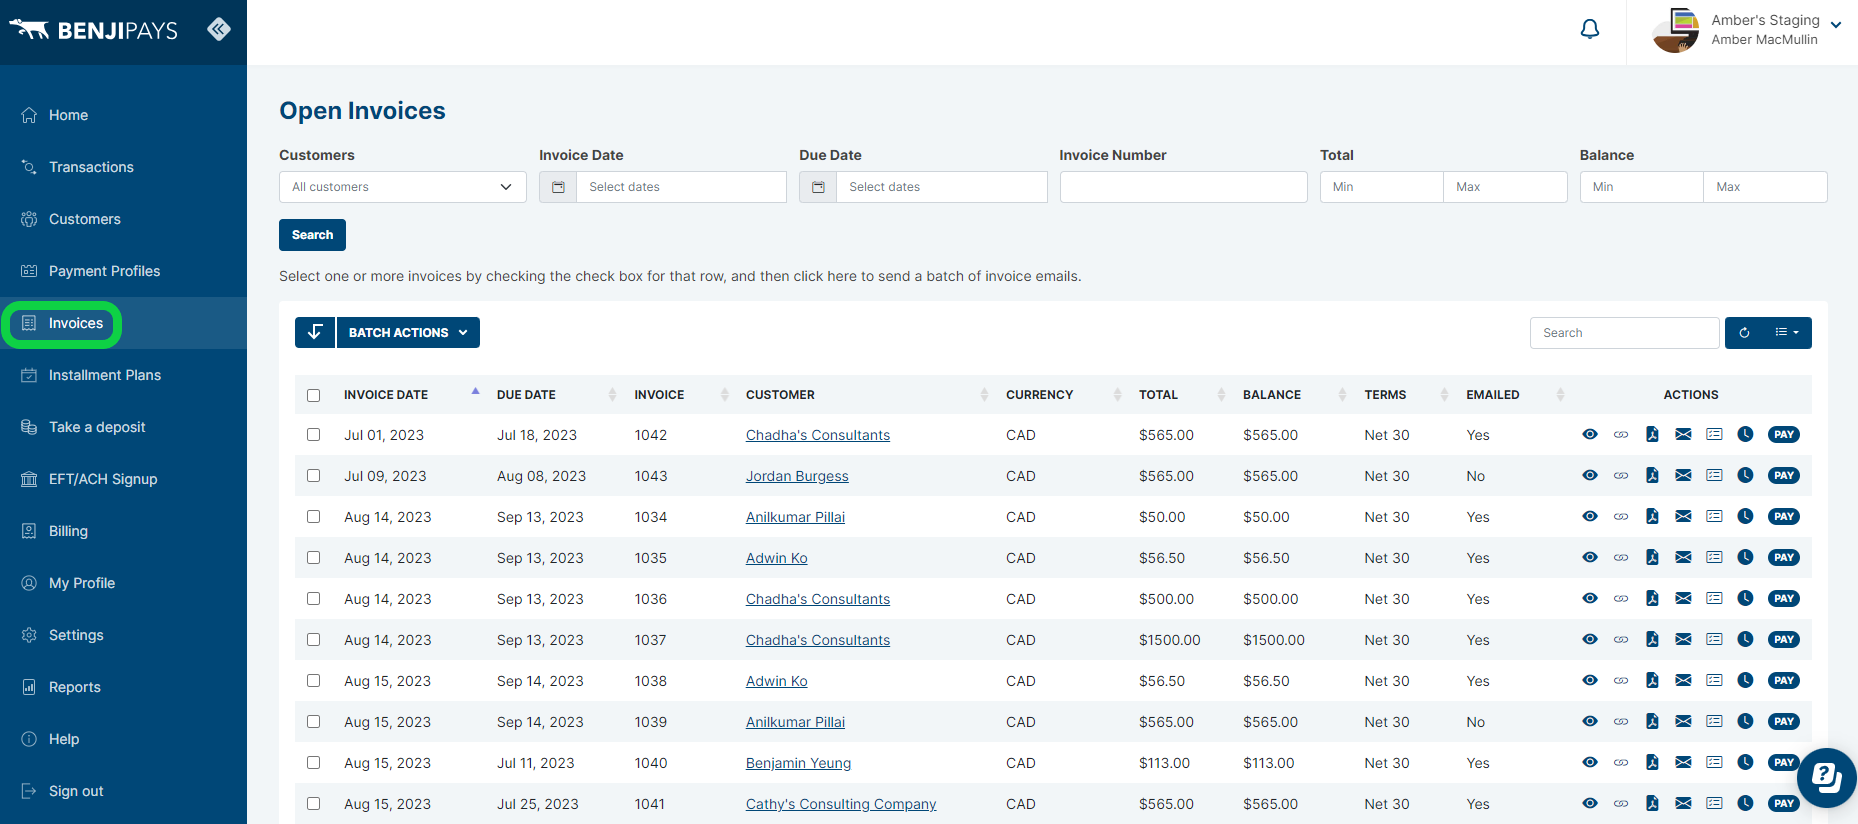
Step 2: You can search your invoices by "Customers" or "Due Date".

Step 3: You can click on individual invoices by checking the box next to the date of the invoice or you can select all invoices by checking the box beside the title "Invoice Date".
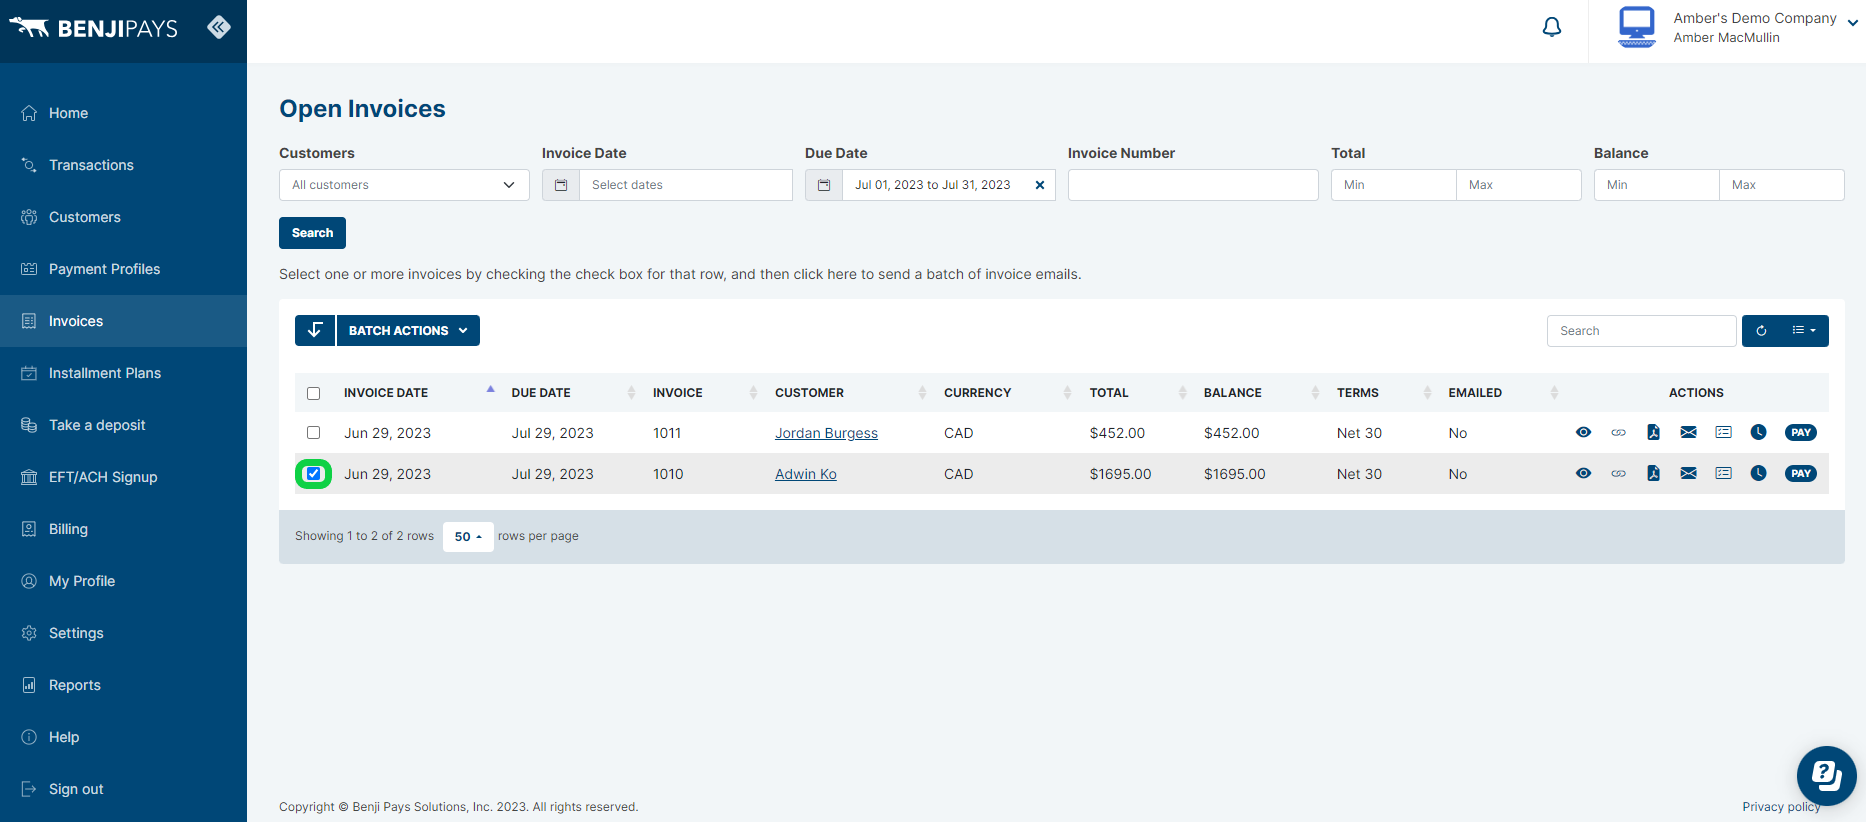
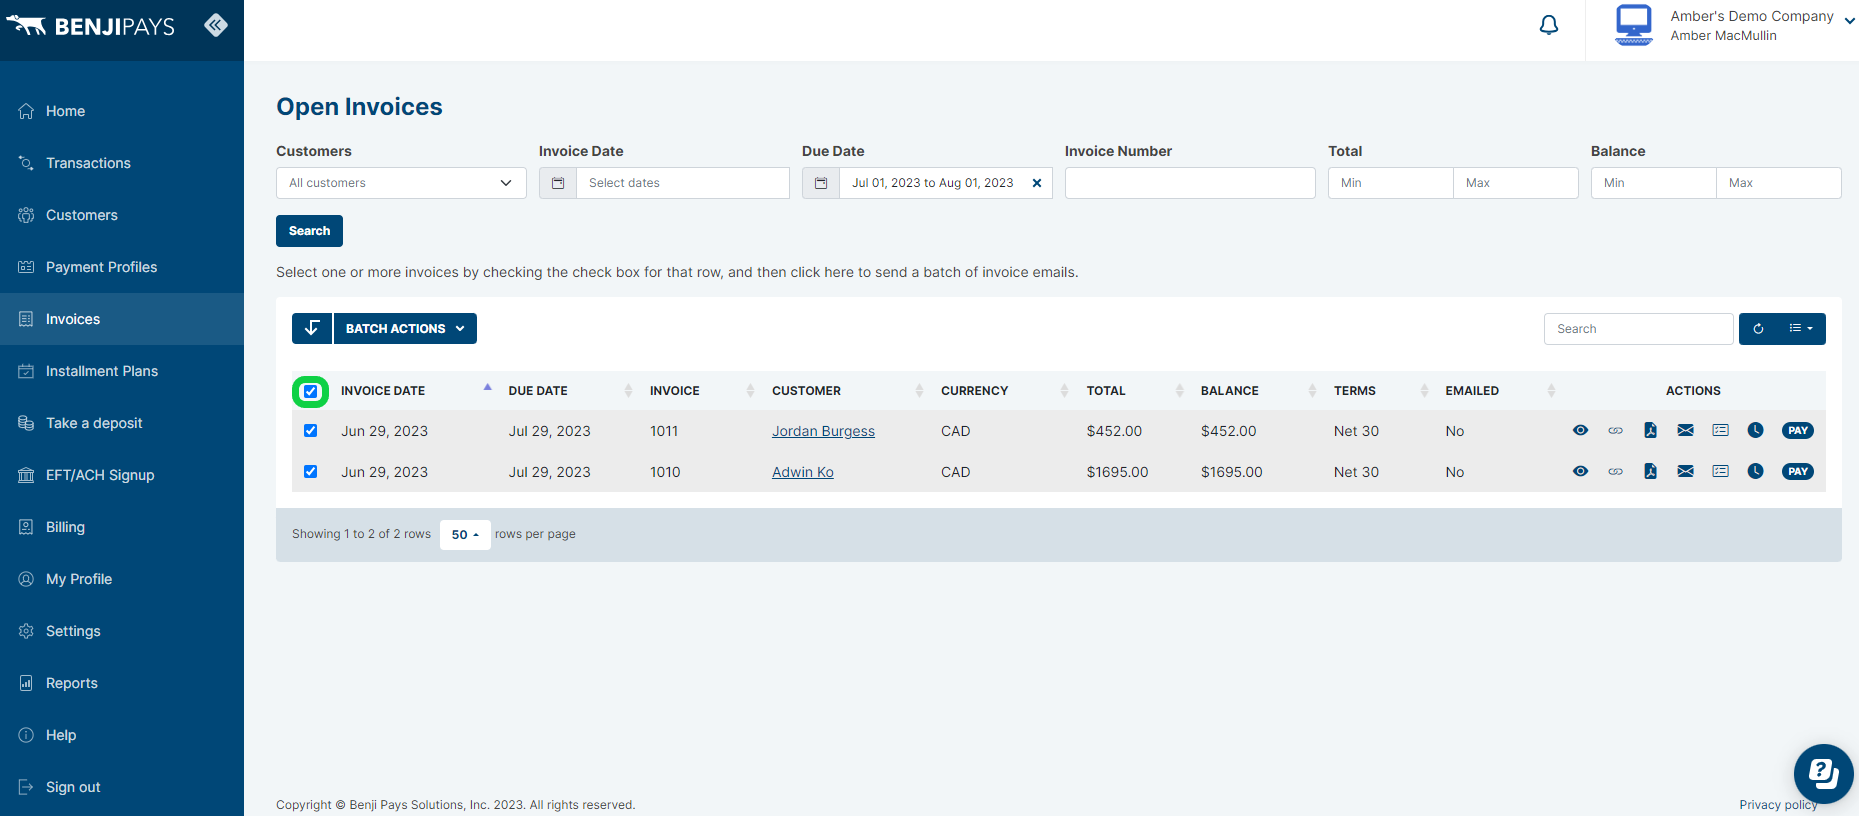
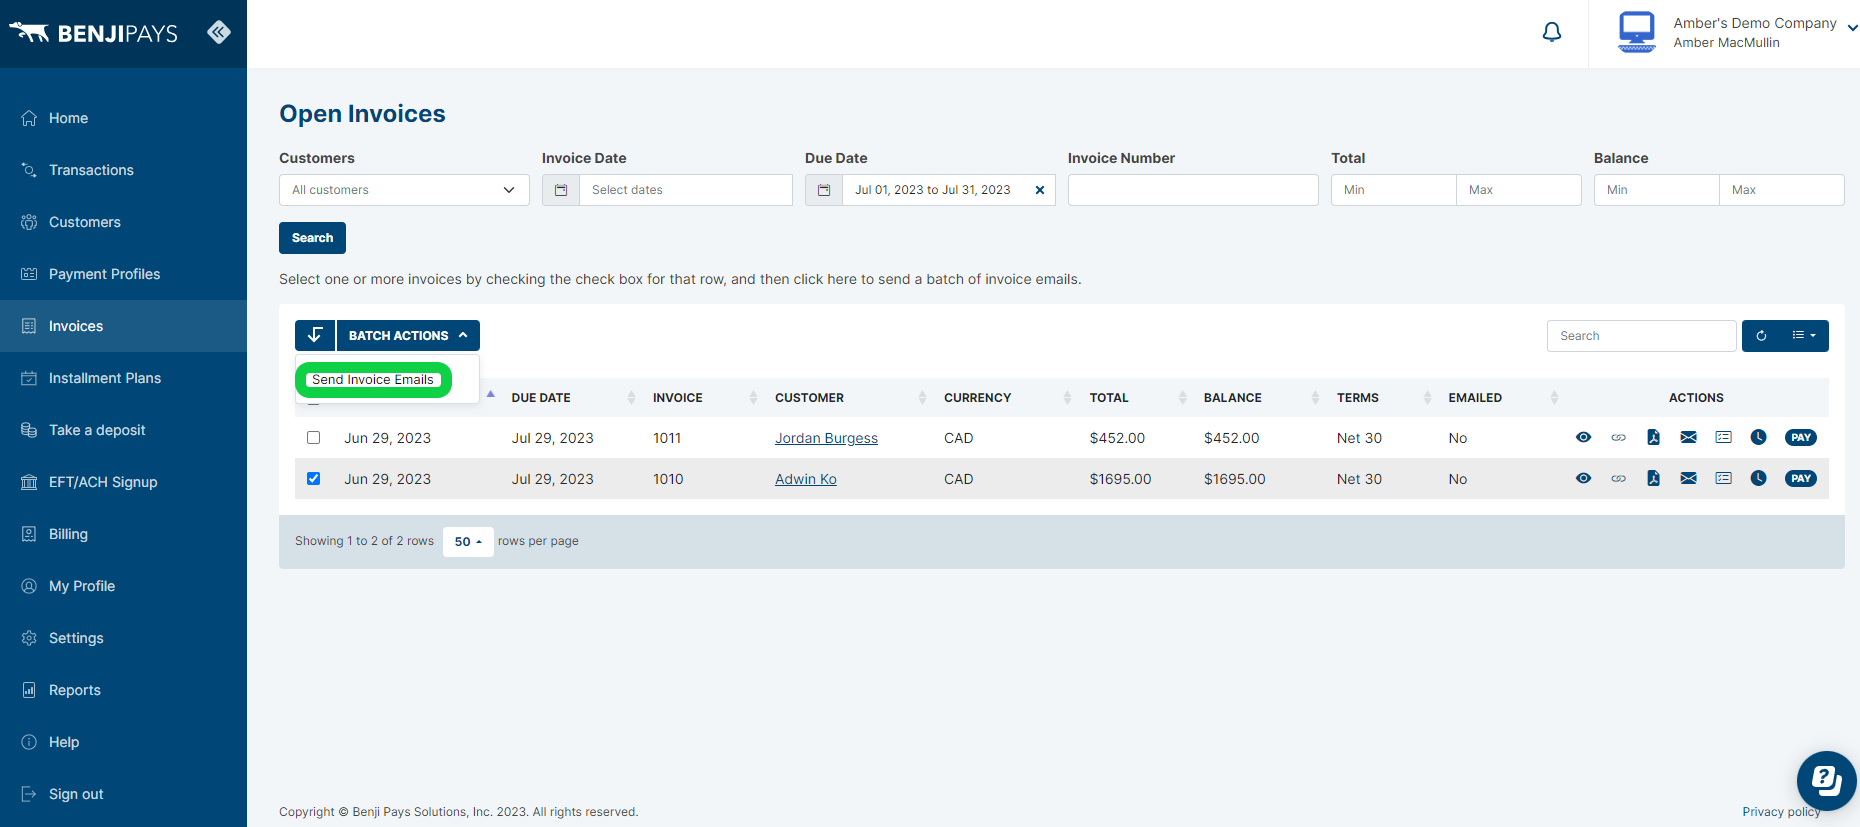
Step 4: Next click on the "Batch Actions" button.

Step 5: Click "Send Invoice Emails".
Step 6: Click on the name of the template you just created.

Step 7: Click on the "Send Invoice Emails" button.

For sending Payment Information Request Email- (Please follow the steps below)
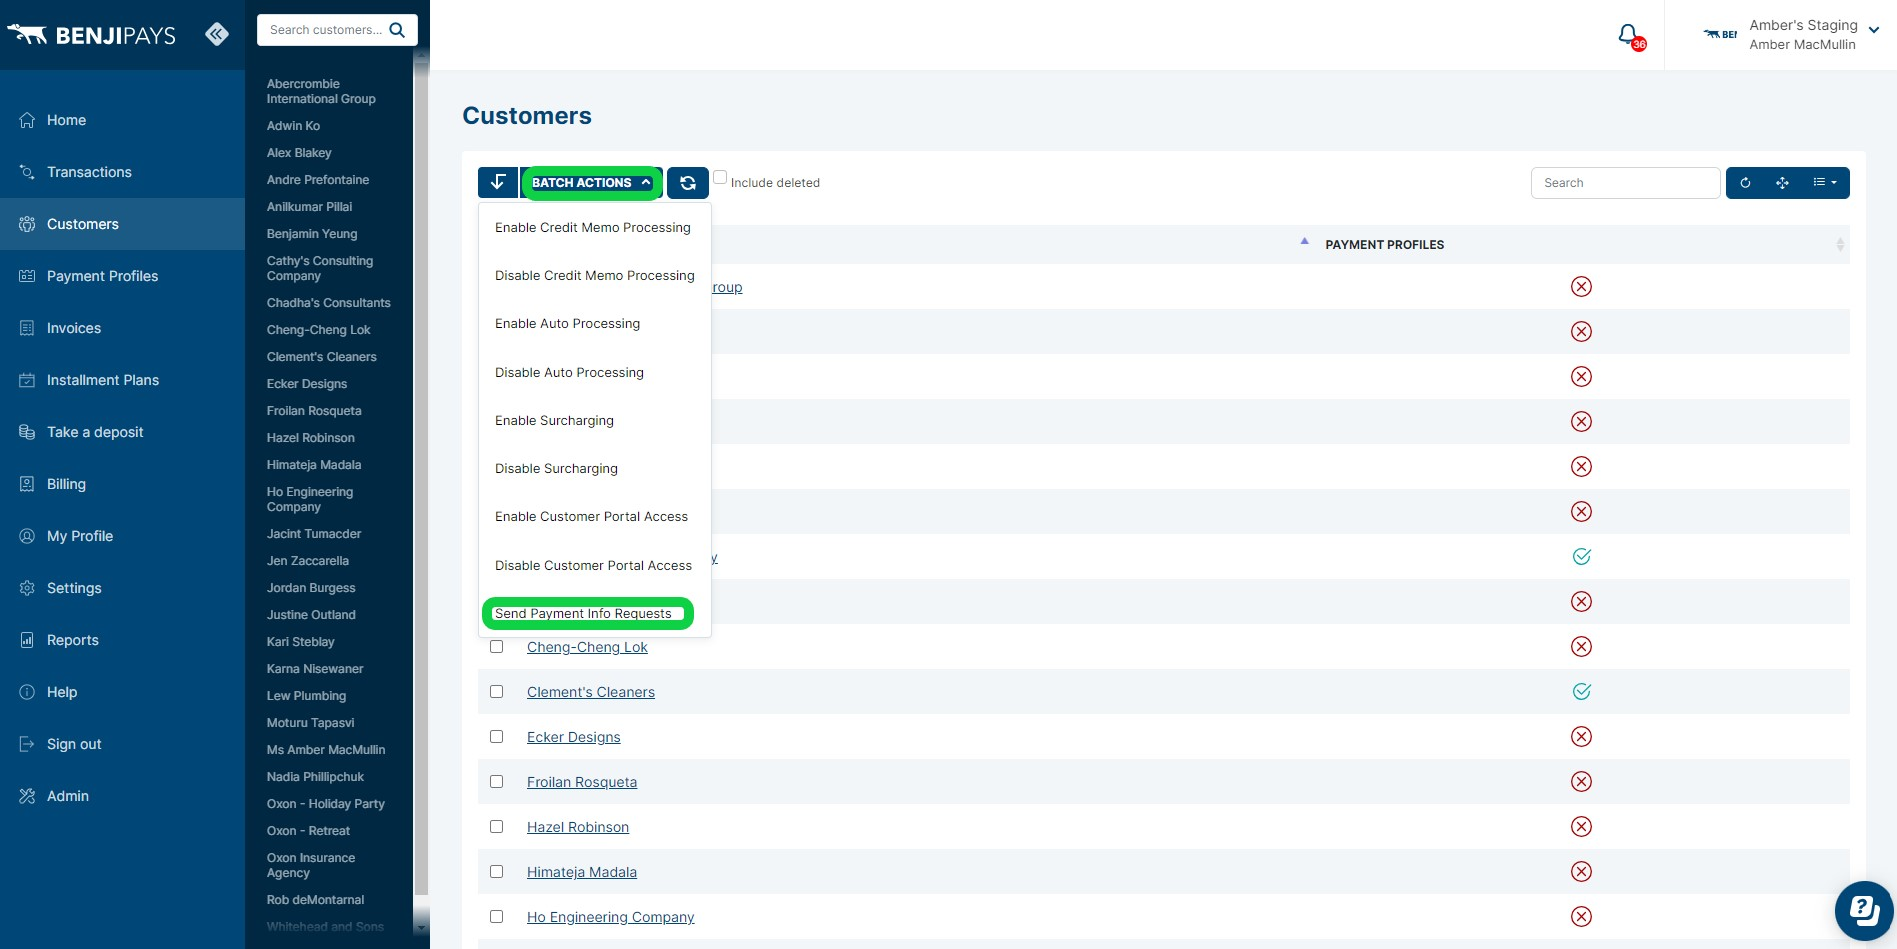
Step 1: Click on "Customers".

Step 2: Check the boxes of the customers you want to send the Payment Info Requests to and then click on Batch Actions and then Select "Send Payment Info Requests".
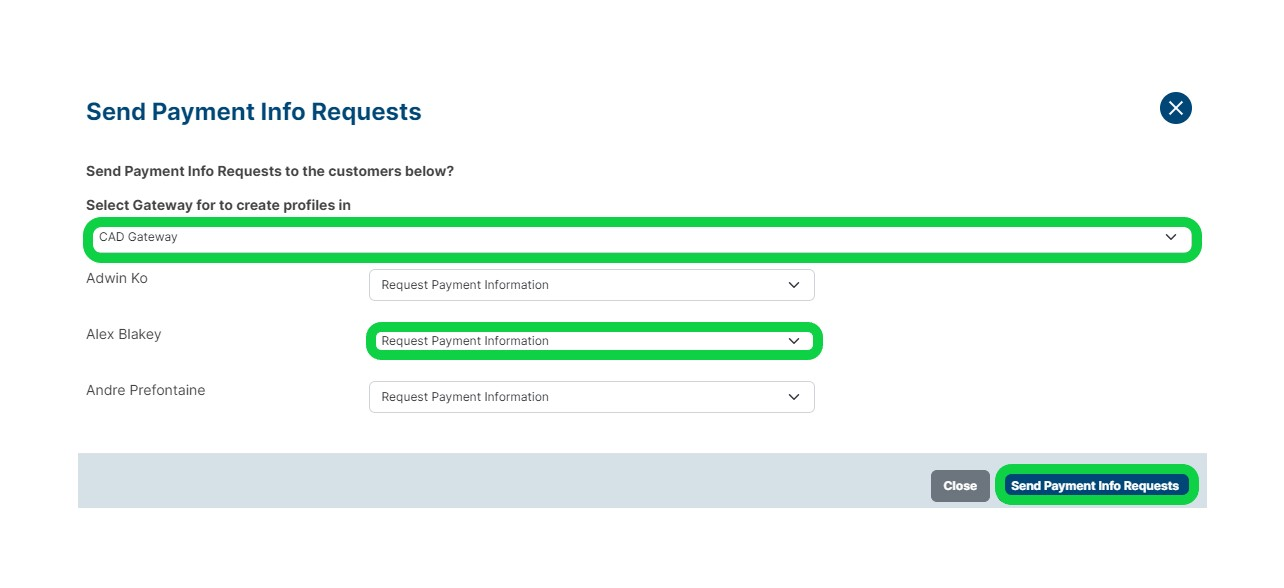
Step 3: Select your Payment Gateway and in the drop down menu next to your customer's name select the name of the payment information email template you created. Next click "Send Payment Info Requests".
Was this article helpful?
That’s Great!
Thank you for your feedback
Sorry! We couldn't be helpful
Thank you for your feedback
Feedback sent
We appreciate your effort and will try to fix the article