Here are the steps to access the multilingual default communication language option in the Merchant portal. This is the default language that will be used when sending emails and receipts to your customers This language will also be used when posting details in your payment transaction in your accounting system.
Step 1: Login to Benji Pays.

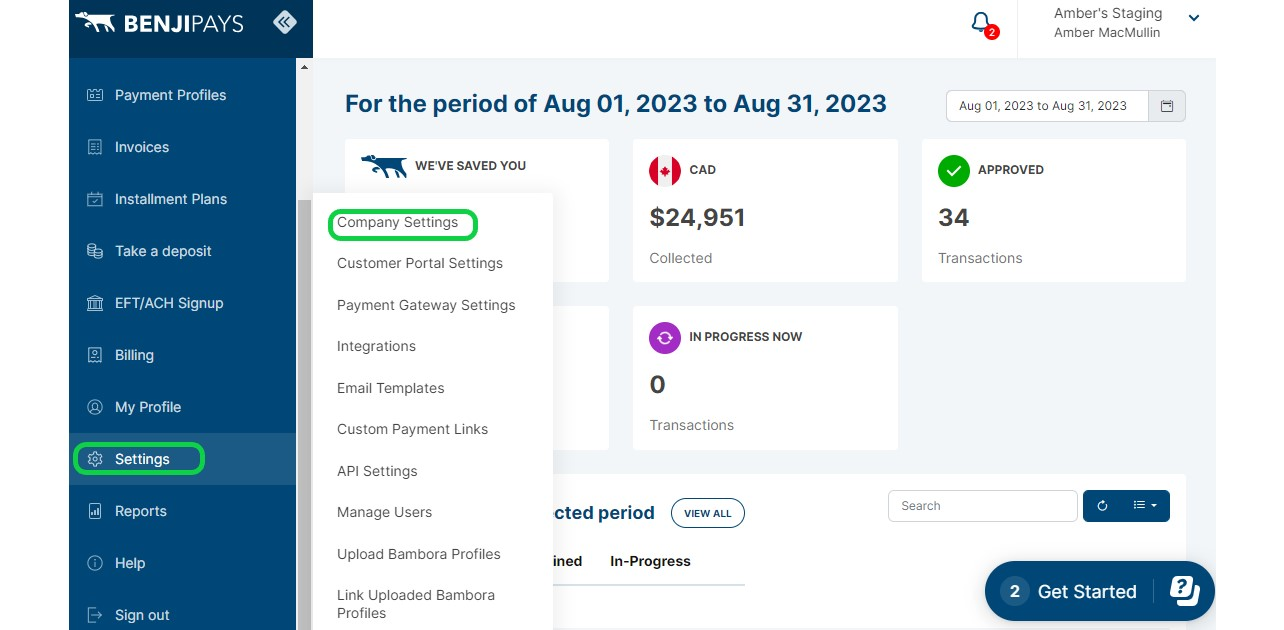
Step 2: Go to Settings and then click on Company Settings.
Step 3: Scroll down until you see "Language Settings" and select "French". Click "Save Language Settings".

The form to fill out to send the invoice email. You can change the "Base Template Language" in this form:

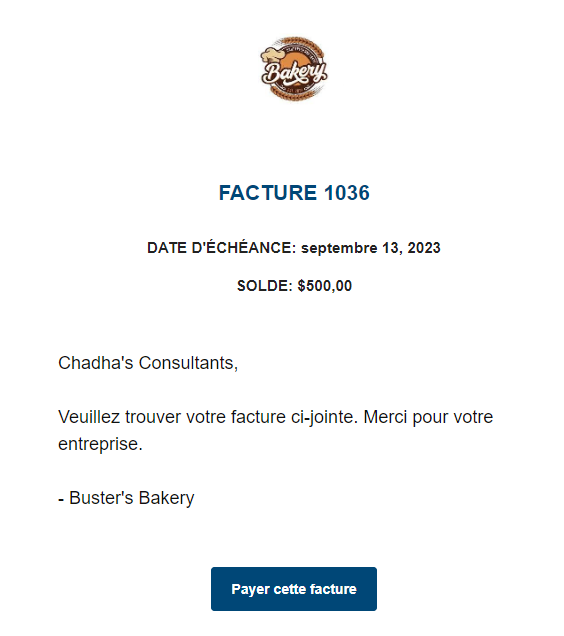
The invoice payment email below:
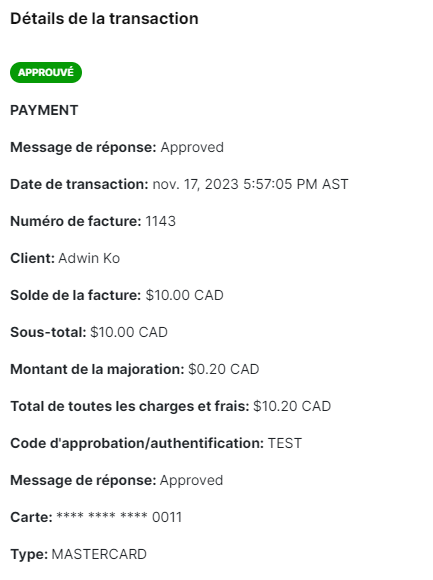
The payment details below:

The payment receipt below:

The invoice memo field from QuickBooks shown in French below:
APPROVED: MASTERCARD $10,20 CAD
--------------------------------------------------
ENREGISTREMENT DE TRANSACTION
--------------------------------------------------
LA TRANSACTION COMPREND UN SUPPLÉMENT
SOUS-TOTAL: $10,00 CAD
SUPPLÉMENT: $0,20 CAD
TOTAL DE TOUTES LES CHARGES ET FRAIS: $10,20 CAD
TYPE: ACHAT
ID DE COMMANDE: 1143-11-17-23215705765
NUMÉRO DE CARTE: **** **** **** 0011
COMPTE: MASTERCARD
DATE/HEURE: 2023-11-17T13:57:05
NUMÉRO DE RÉFÉRENCE: 10000178
NUMÉRO D'AUTORISATION: TEST
-- APPROUVÉ - MERCI --
--------------------------------------------------
IMPORTANT - CONSERVEZ CETTE COPIE POUR VOS DOSSIERS
*** COPIE DU CLIENT ***
Multilingual Email templates
For creating multilingual email templates to send notifications regarding invoices and to send payment information requests, follow the steps below:
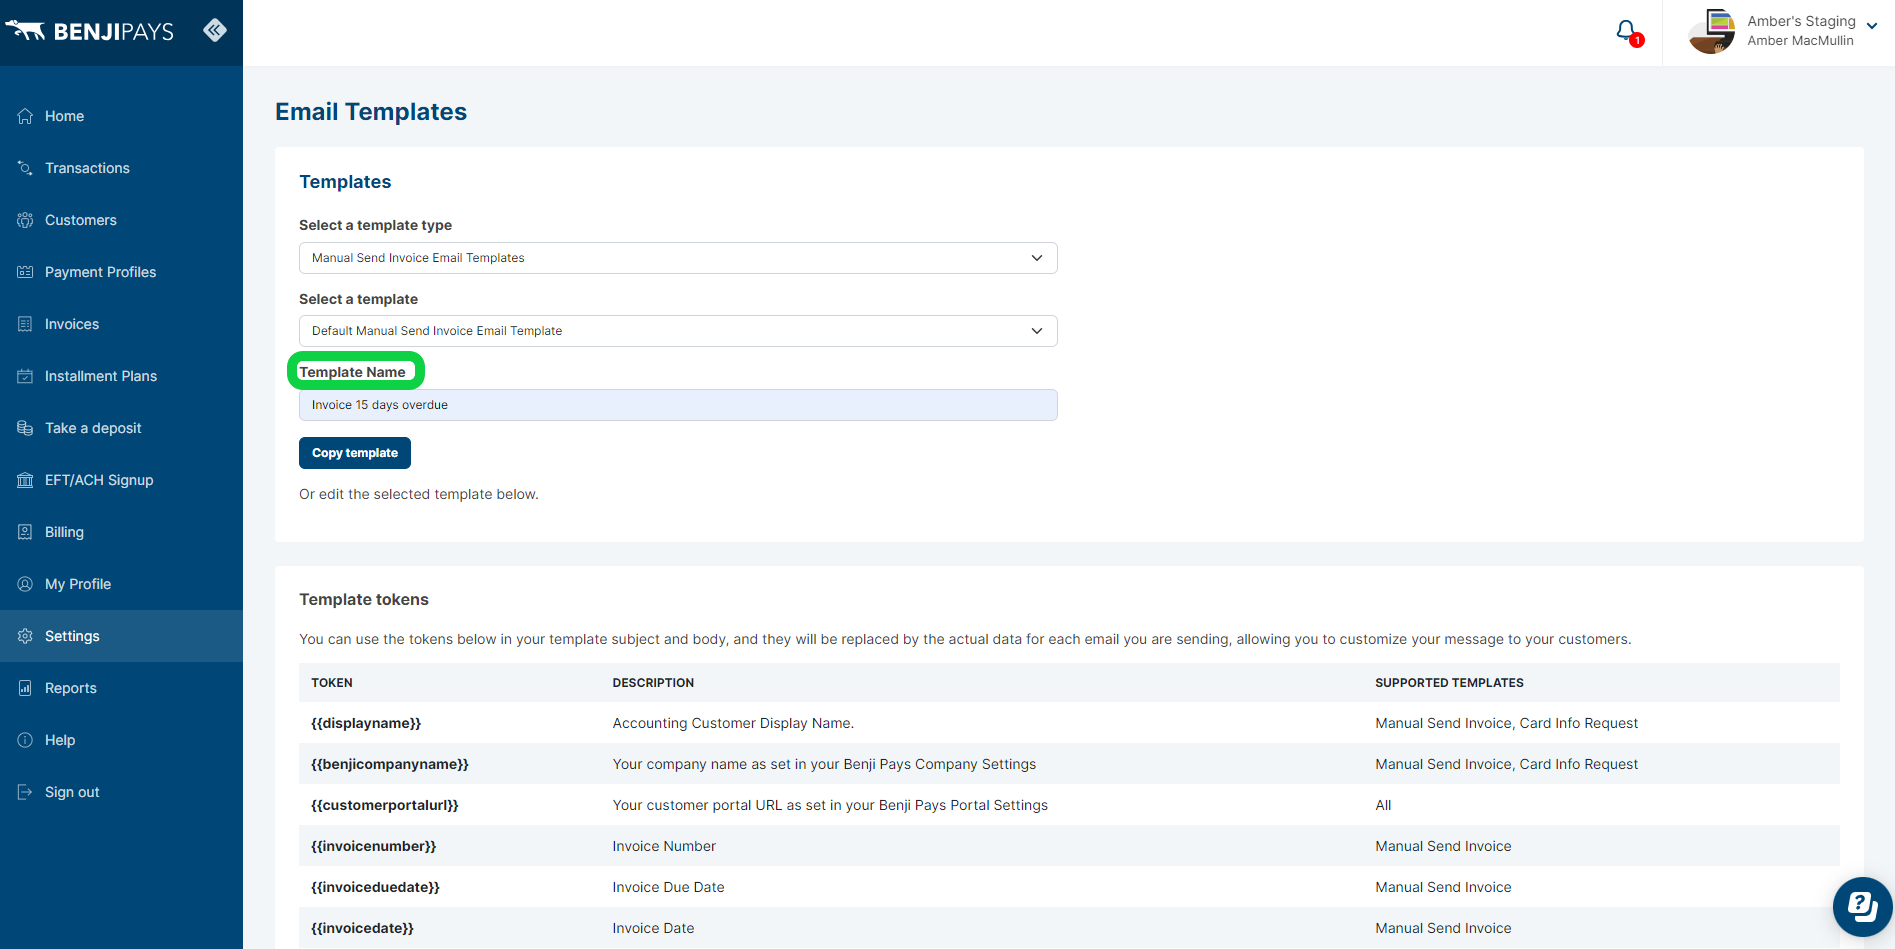
Step 1: Click on "Settings" and then select "Email templates".

Step 2: Select the Template type from the drop down menu.

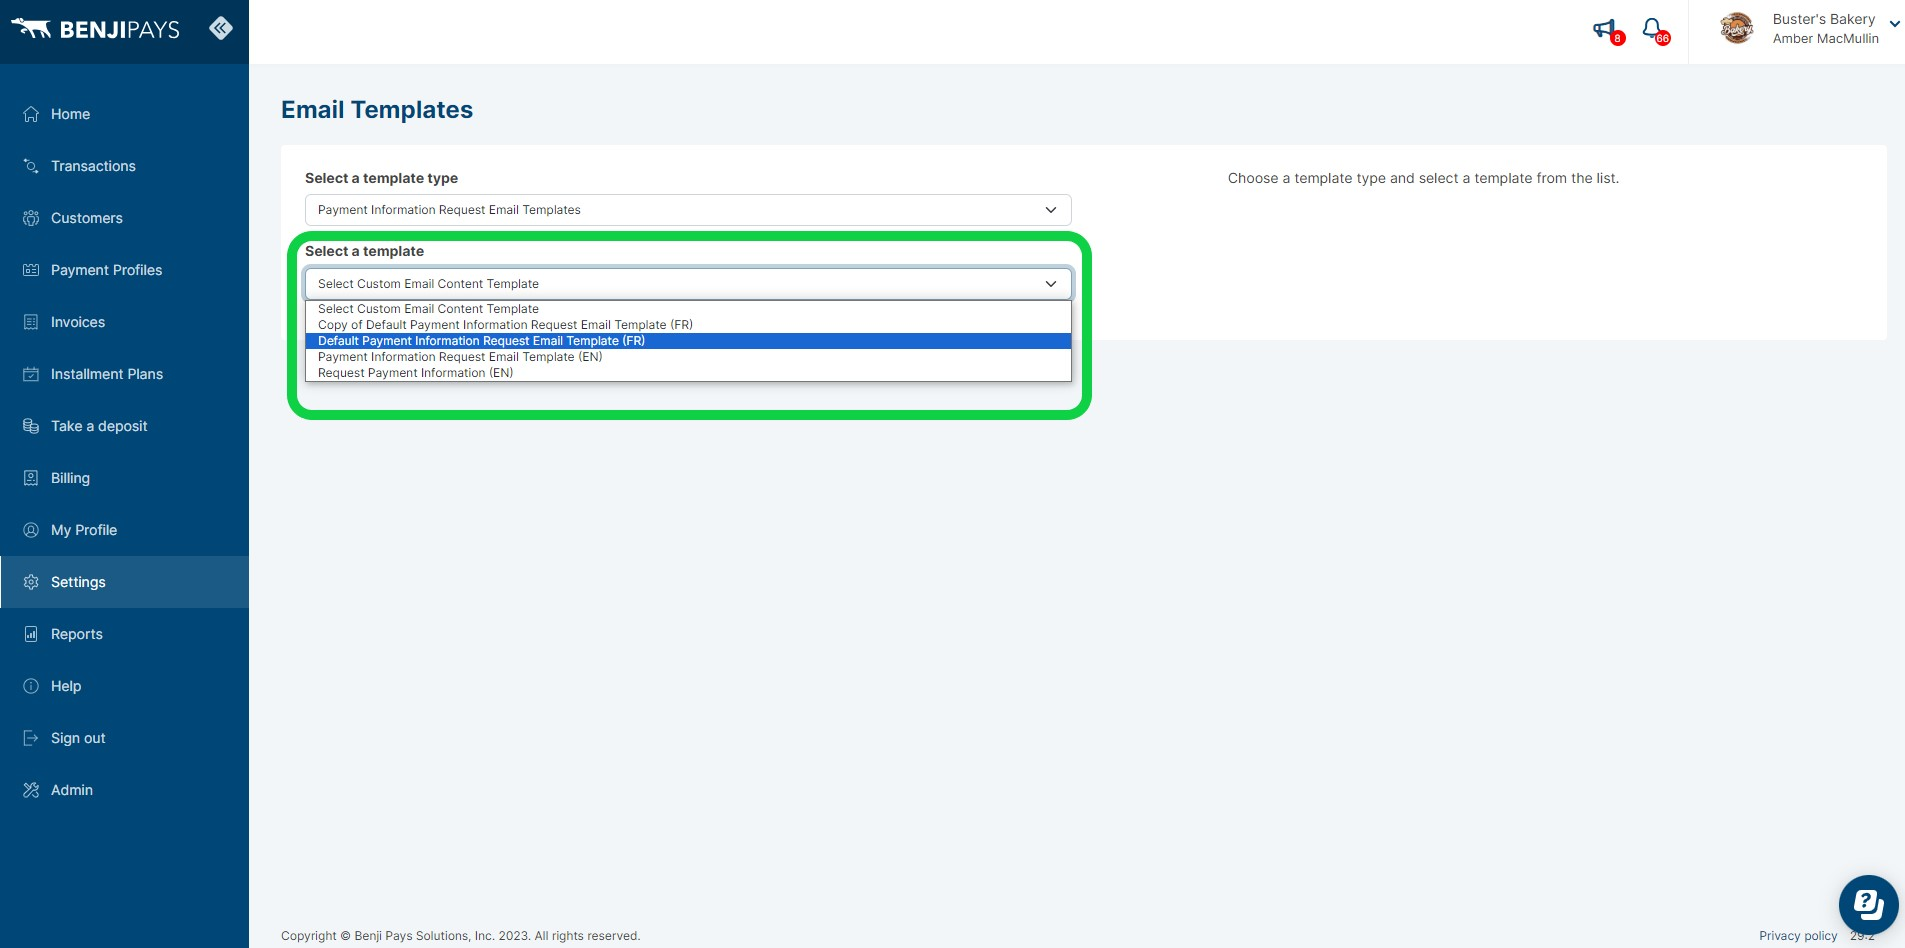
Step 3: Select a template. Choose (EN) for English or (FR) for French.
Step 4: Click on the "Copy template" button.
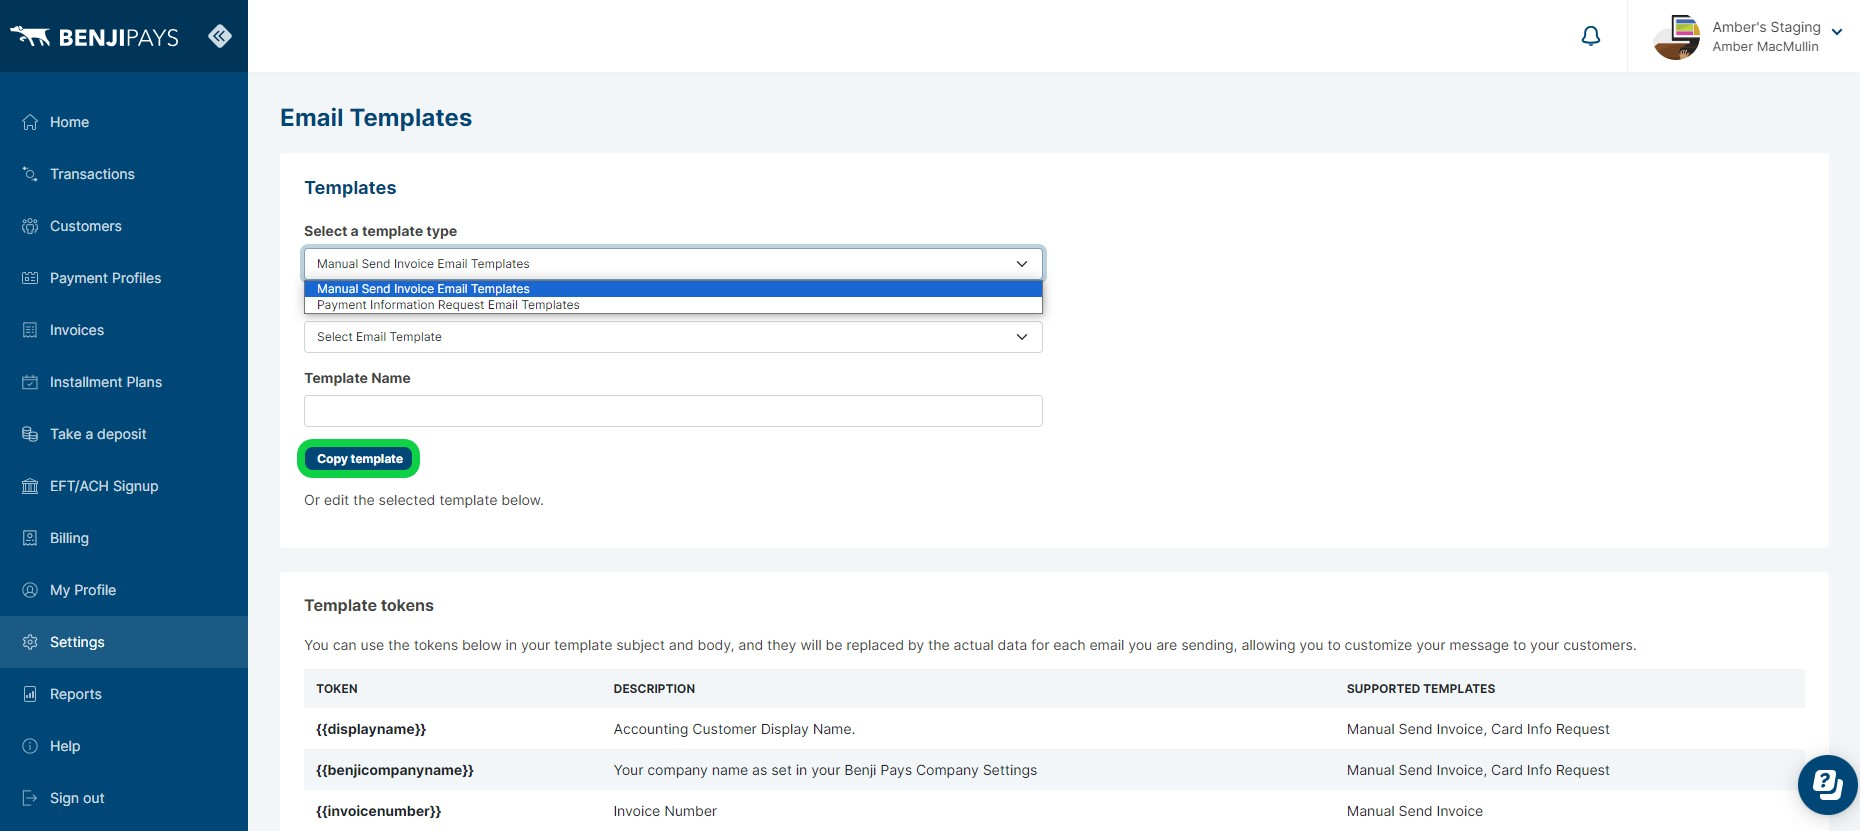
Step 5: Rename the template under "Template Name".
Step 6: These Template Tokens are available to use in the subject and body of the template. They will be replaced with the actual data for each email you are sending. This allows you to customize your message to your customer.
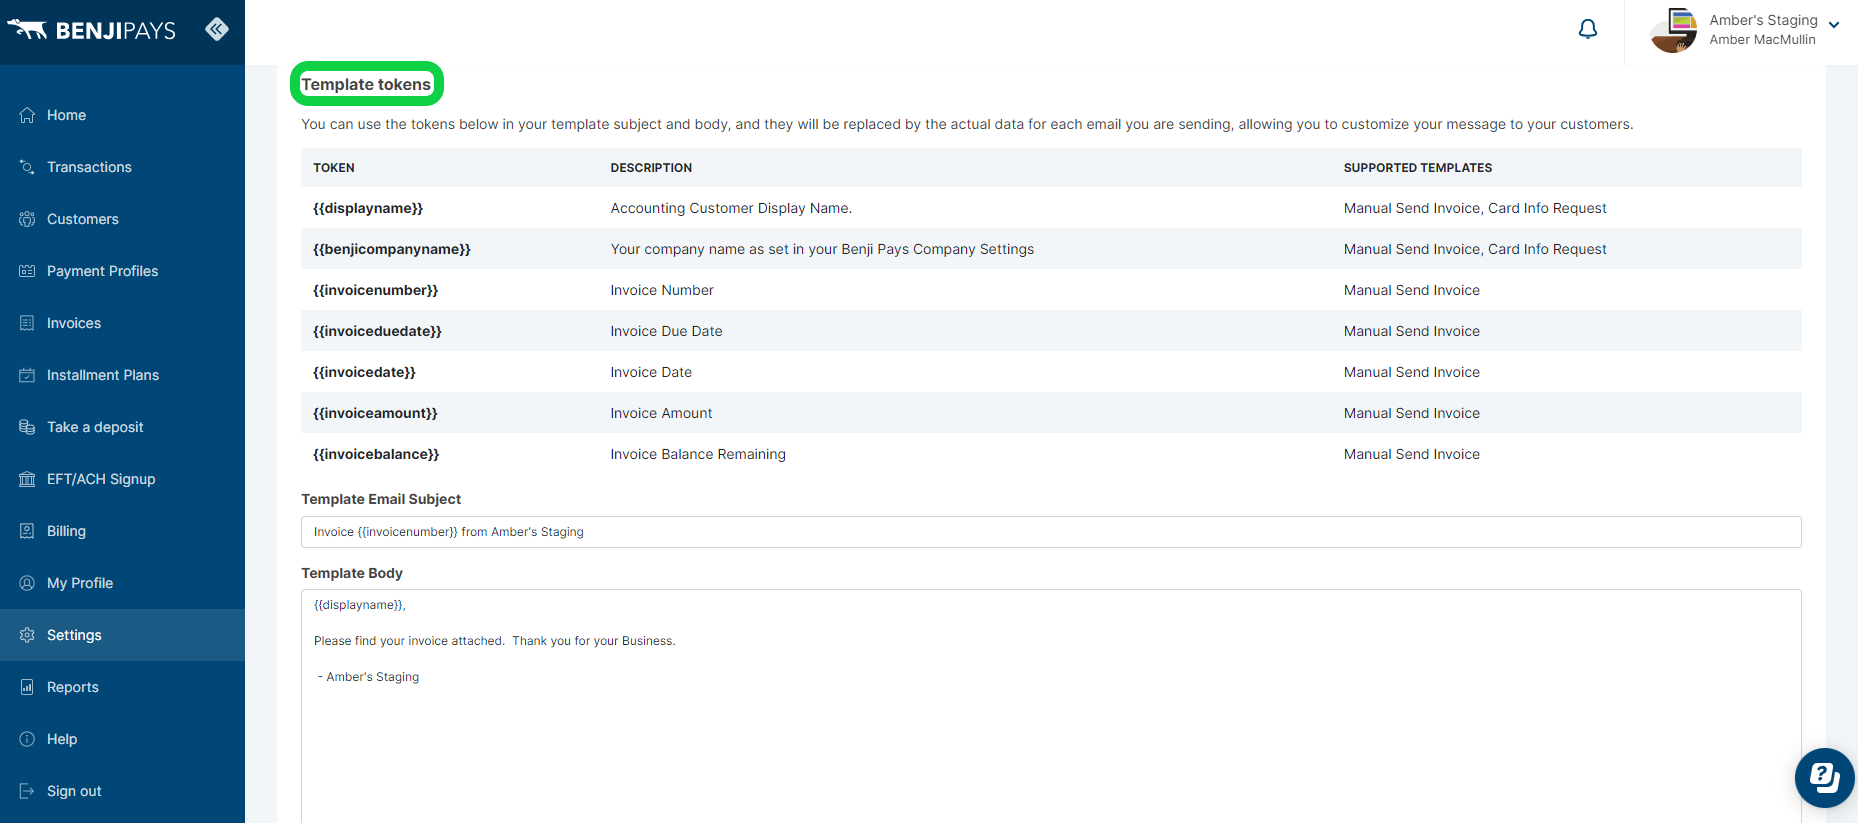
Step 7: You can change the Template Email Subject as well as the Template body by clicking in those areas and typing in the links or information you want to add to the email template. Once you have filled in the subject and body of the template, click the "Save" button.

New features: You can delete a template by clicking the "Delete template" button, you can revert to your last saved version of your template by clicking the "Revert to last saved version" button and you can preview your template by clicking "Preview template" to see what it looks like to your customers. See screenshots below.


For sending Invoice Email- (see steps below)
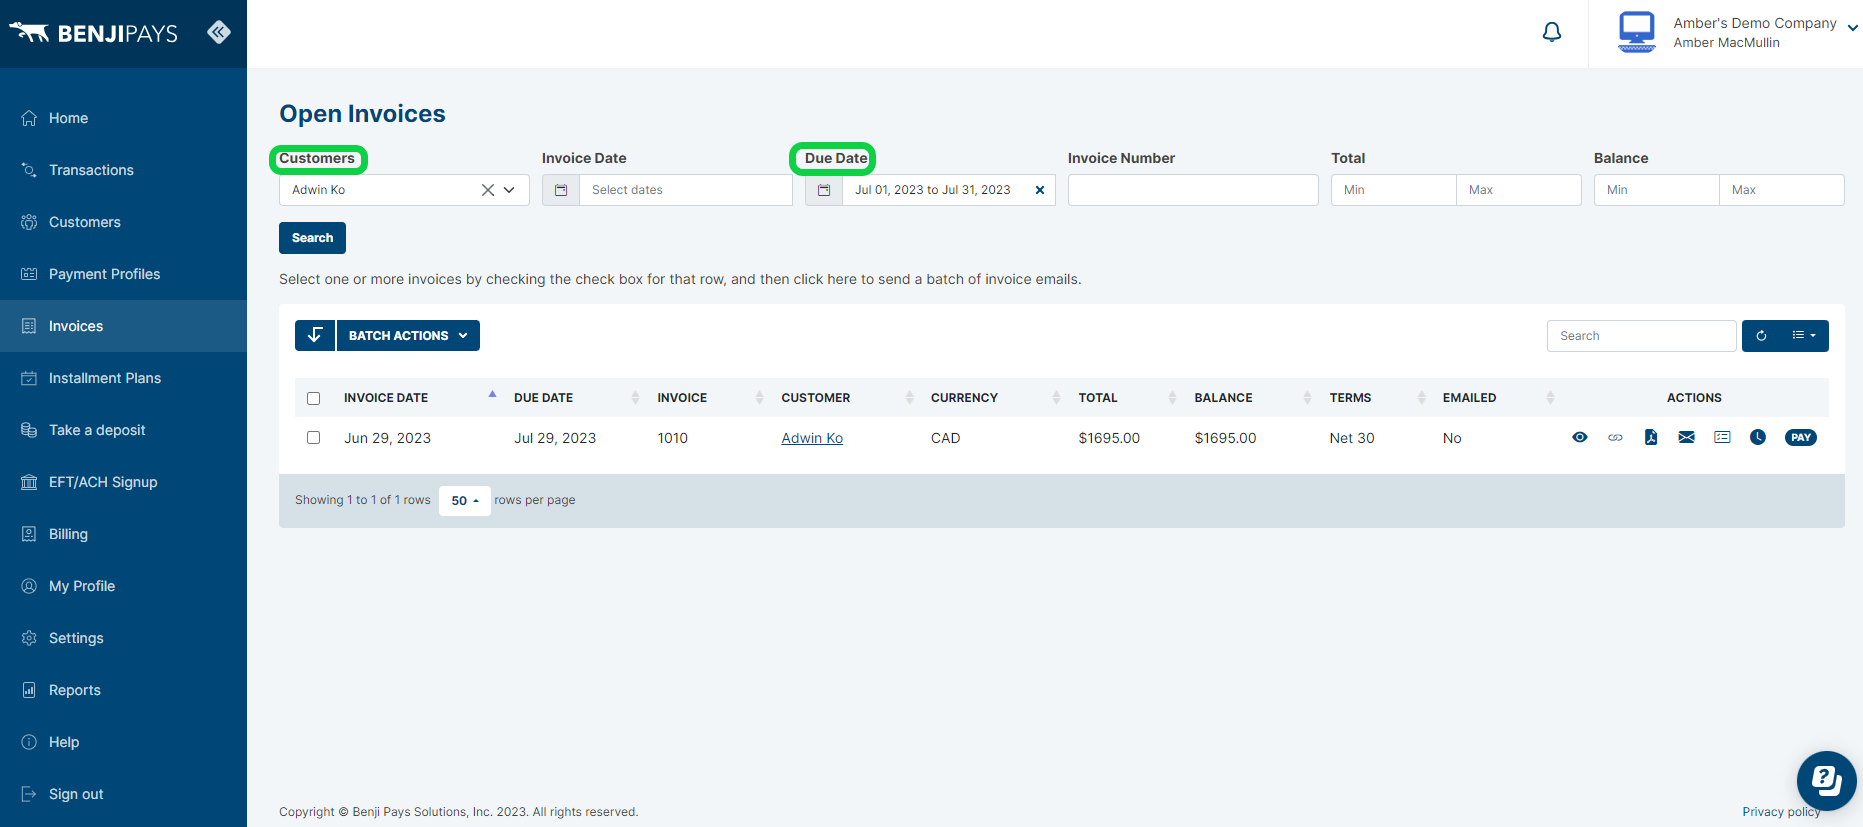
Step 1: To the left in the blue menu click on "Invoices".

Step 2: You can search your invoices by "Customers" or "Due Date".
Step 3: You can click on individual invoices by checking the box next to the date of the invoice or you can select all invoices by checking the box beside the title "Invoice Date".
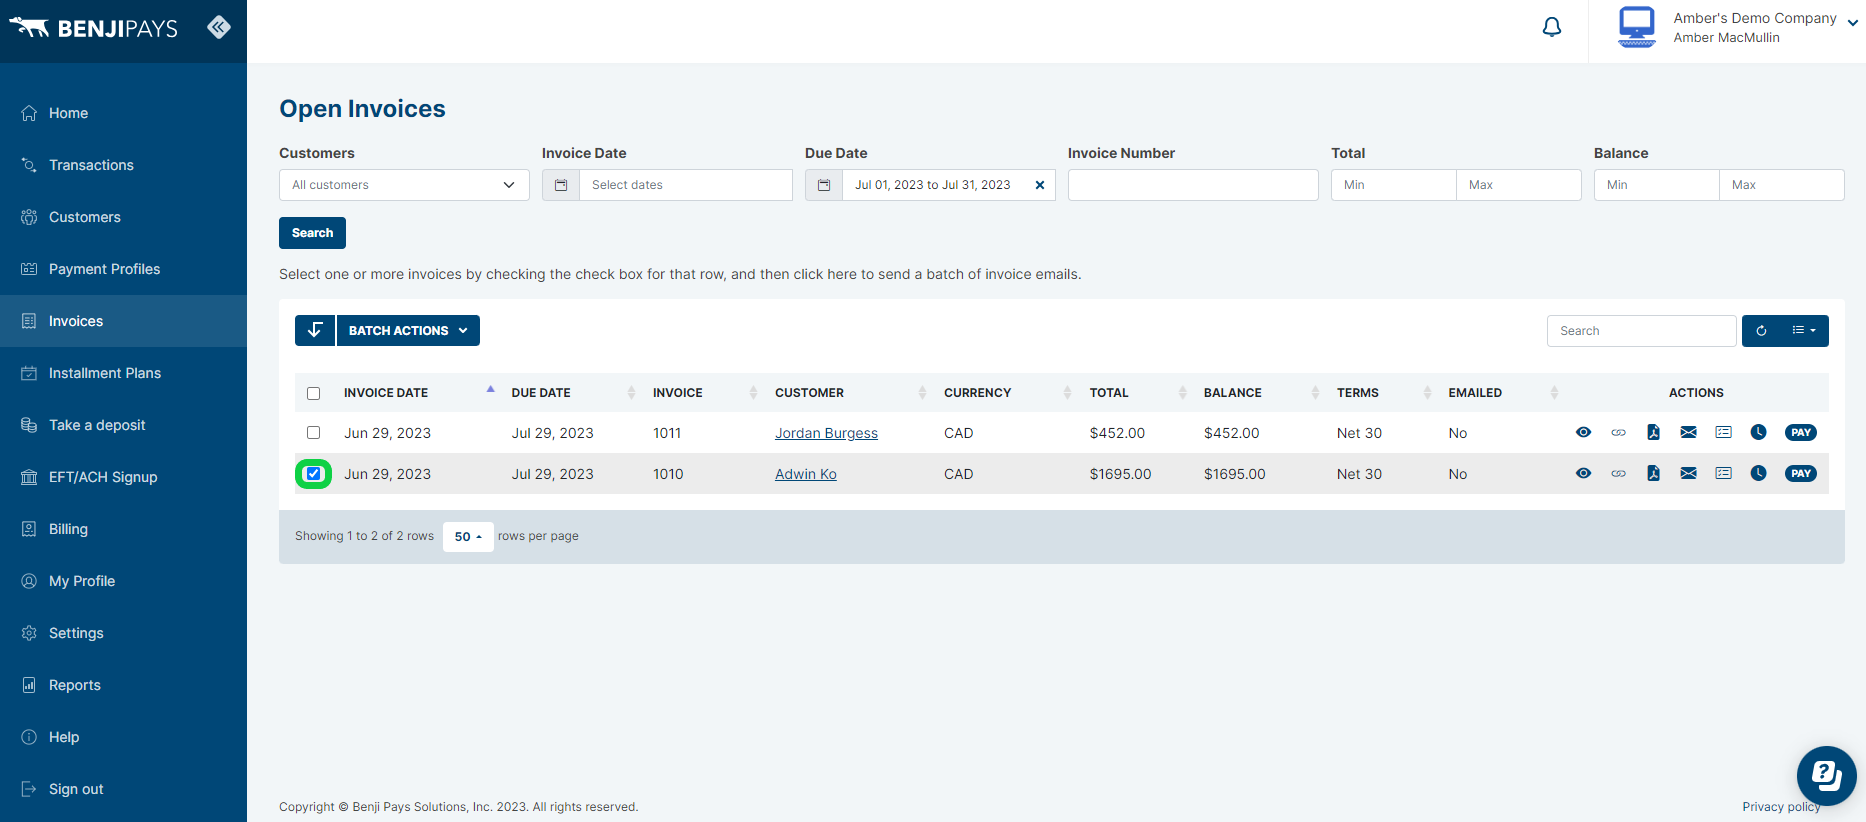

Step 4: Next click on the "Batch Actions" button.

Step 5: Click "Send Invoice Emails".

Step 6: Click on the name of the template you just created.
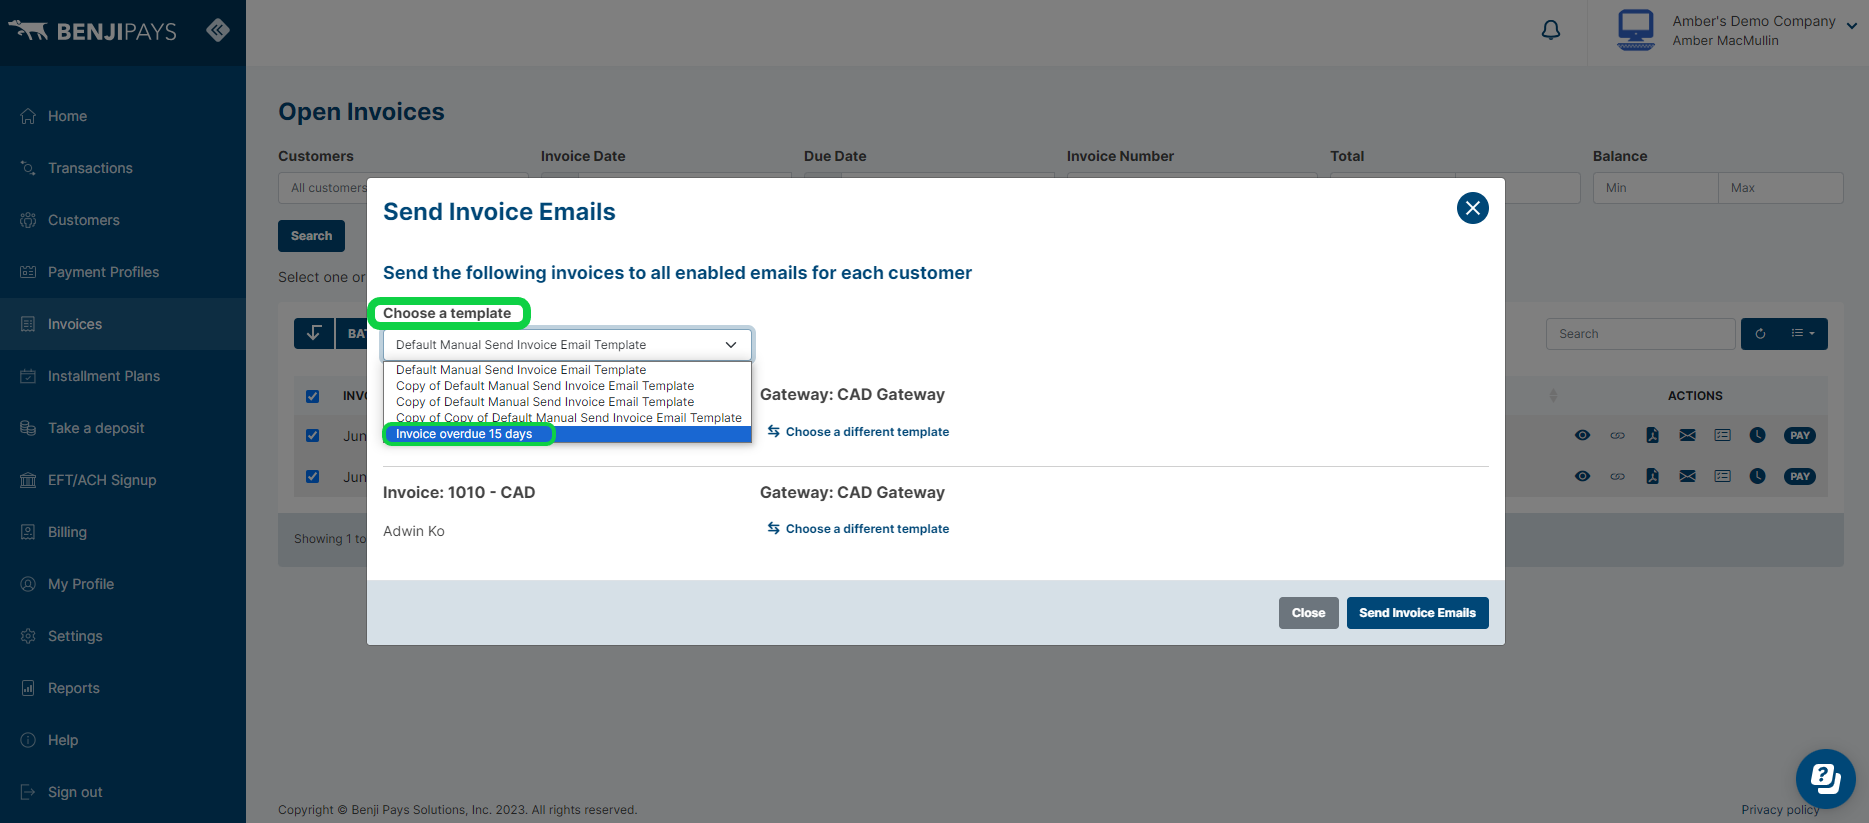
Step 7: Click on the "Send Invoice Emails" button.

For sending Payment Information Request Email- (Please follow the steps below)
Step 1: Click on "Customers".

Step 2: Check the boxes of the customers you want to send the Payment Info Requests to and then click on Batch Actions and then Select "Send Payment Info Requests".

Step 3: Select your Payment Gateway and in the drop down menu next to your customers' name select the name of the payment information email template you created. Next click "Send Payment Info Requests".

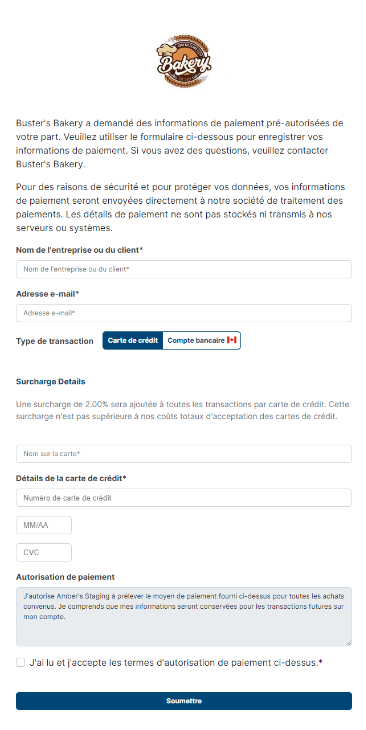
Below is an example of the Payment Info Request shown in French:
Multilingual Pre Authorization agreements
To change the language for your Pre Authorization agreements please follow the steps below:
Step 1: Click on Settings and then click Customer Portal Settings.

Step 2: Scroll down to "Pre Authorization Agreements". Click on French and then click "Save French Pre Authorization Agreement" to save your Pre Authorization agreement in French.

Multilingual Customer Portal
To change the language in the Customer Portal please click on the drop down menu in the bottom left hand side of the screen and select "Français". You should now see the Customer Portal displayed in French.
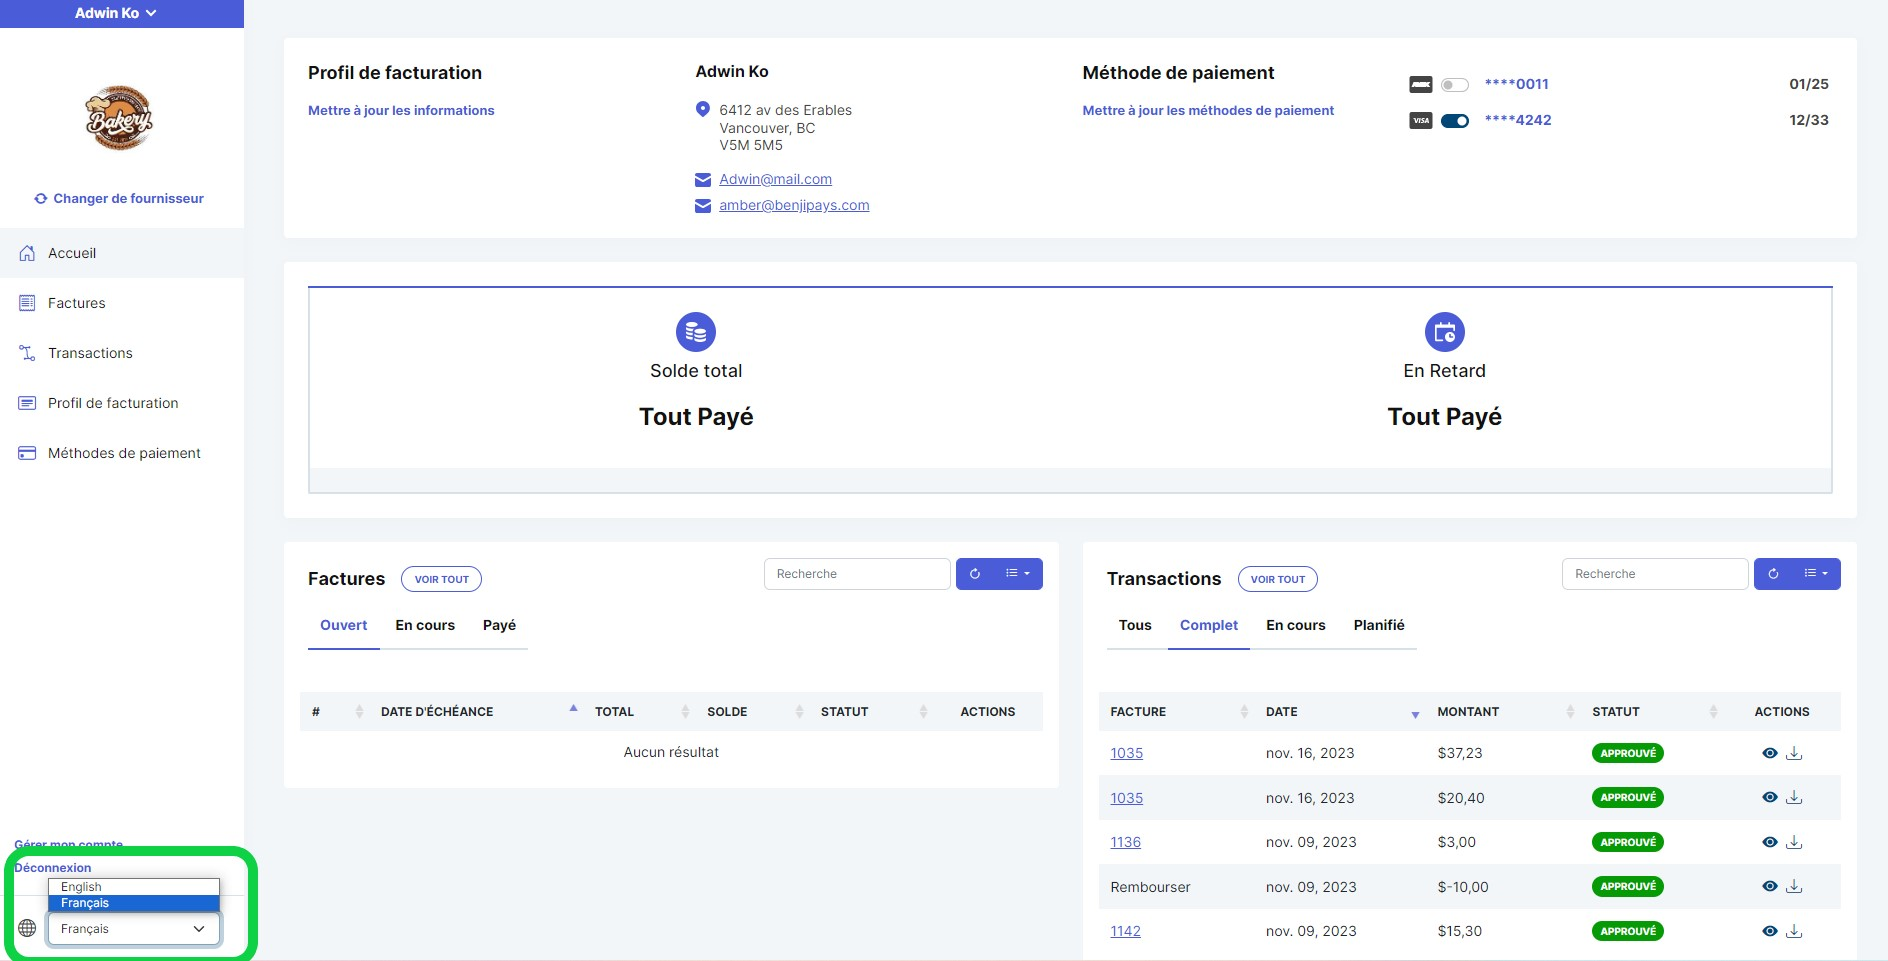
Some of the features you can see in the Customer Portal below:


Was this article helpful?
That’s Great!
Thank you for your feedback
Sorry! We couldn't be helpful
Thank you for your feedback
Feedback sent
We appreciate your effort and will try to fix the article